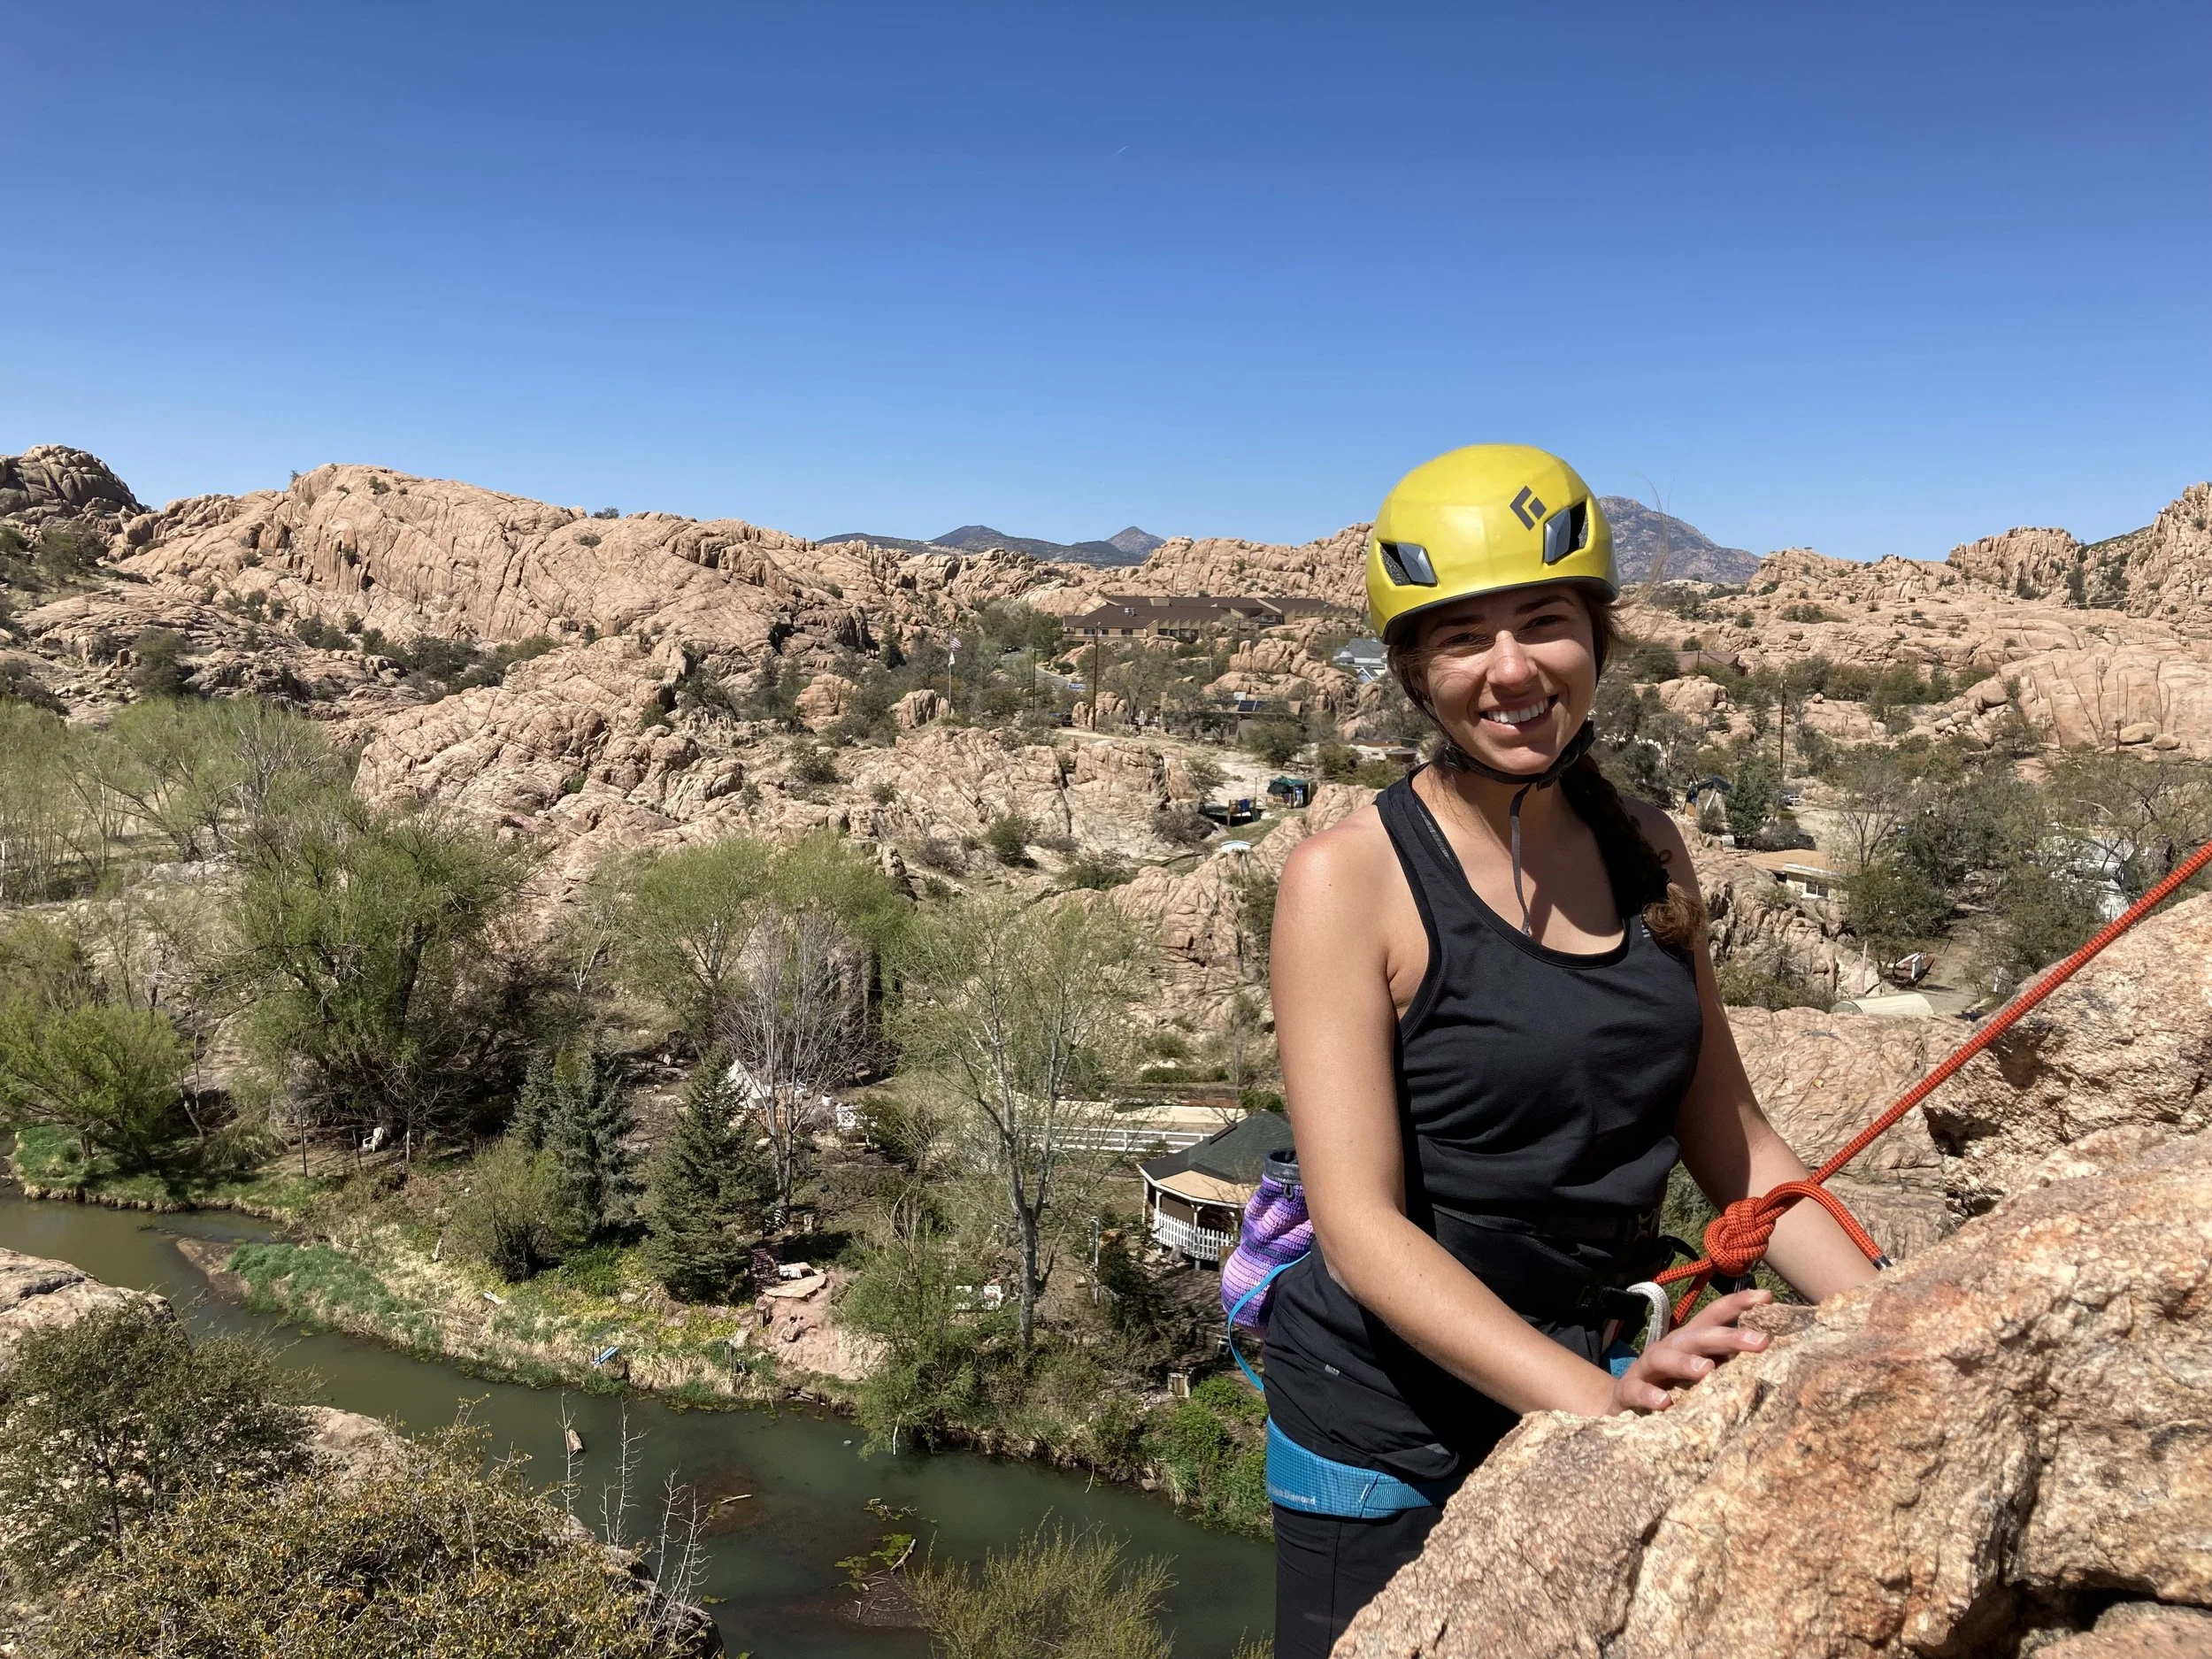
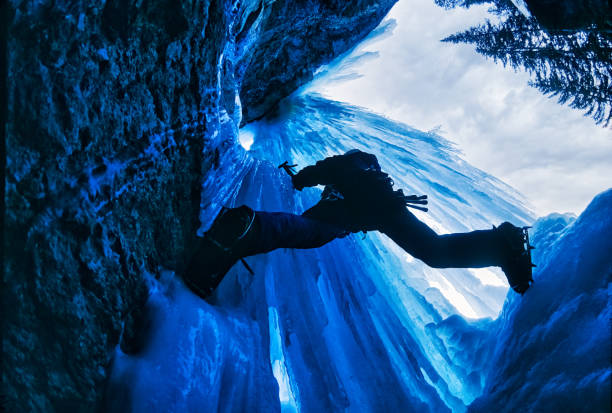
As a seasoned ice climber with over 15 years of experience—from the frozen waterfalls of Banff to the alpine ice walls of Alaska—I’ve learned one thing above all: ice climbing is equal parts thrill and respect. The ice doesn’t care about your skill level, your gear, or your ambition. It demands focus, preparation, and a keen eye for detail. Whether you’re a beginner looking to step beyond the indoor ice gym or an intermediate climber chasing more challenging natural ice, this guide breaks down the safety rules I live by and the secrets to picking the perfect ice wall (yes, we avoid “icebergs”—more on that later).
First: Let’s Clear Up a Common Misconception
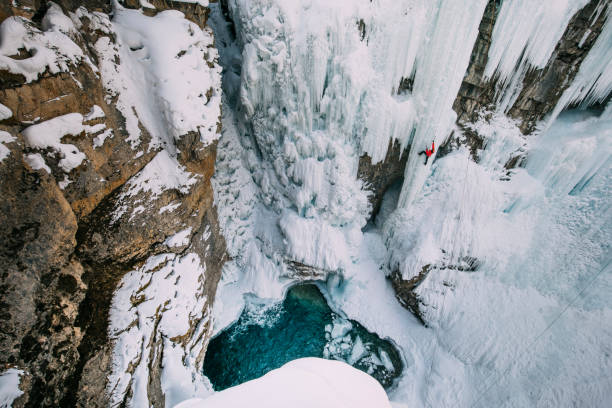
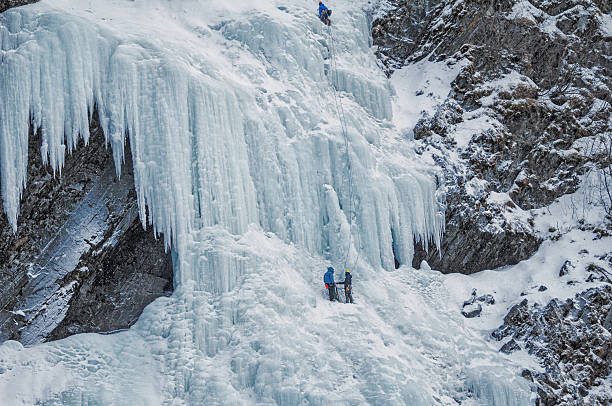
When people say “ice climbing on icebergs,” I cringe a little. True floating icebergs are unpredictable, unstable, and far too dangerous for even the most advanced climbers—they shift, crack, and calve without warning. What we actually climb are ice walls, icefalls, and frozen cliffs: solid, anchored ice formations that form in canyons, on mountain slopes, or along rivers. These are the “icebergs” we’re talking about here—safe, climbable ice that rewards preparation.
Safety First: The Non-Negotiable Rules I Never Break
Ice climbing is high-risk, but most accidents aren’t due to “bad luck”—they’re due to cutting corners. Here are the safety tips that have kept me (and my climbing partners) alive for over a decade.
1. Gear Isn’t Optional—It’s Your Lifeline
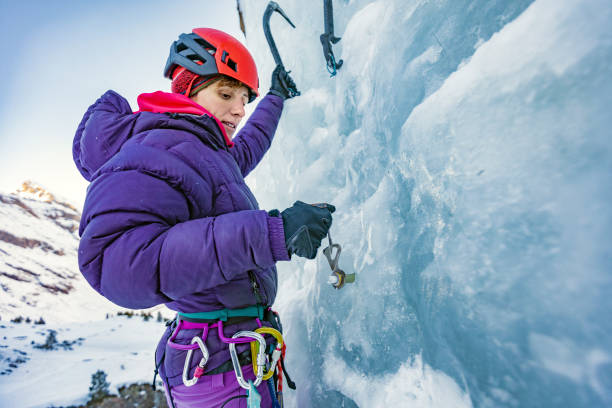
I’ve seen beginners skimp on gear to save money, and it’s never worth it. Ice is unforgiving, and a single faulty piece of equipment can be fatal. Here’s what I always carry (and inspect twice before every climb):
- Two ice axes (never one—backup is non-negotiable). I prefer curved shafts for better grip on steep ice, but straight axes work for beginners.
- Crampons that fit your boots perfectly. Loose crampons slip, twist, and can cause you to lose footing. Test them before you head out—no wiggle, no gaps.
- A helmet (always, always, always). Ice chunks fall, ice screws pop out, and rocks loosen—your head is your most vulnerable asset.
- A full safety system: harness, dynamic rope (static rope is for rappelling only), locking carabiners, slings, and ice screws (at least 6–8, depending on the route).
- Protective clothing: Waterproof, breathable shell (Gore-Tex is a must), insulated gloves (I use mittens with liners for warmth and dexterity), thermal layers, and anti-fog goggles (sunlight on ice is blinding).
Pro tip: Inspect your gear after every climb. Ice can scratch ropes, bend crampon points, and weaken slings—replace anything that shows wear.
2. Read the Ice (and the Weather) Like a Book
The ice’s condition changes by the hour, and weather can turn deadly in minutes. I never start a climb without checking three things:
- Temperature: Avoid climbing midday when temperatures rise above freezing. Warm ice gets soft, making it hard to place ice screws and increasing the risk of ice collapse. Dawn or late afternoon (in winter) is best—cold ice is hard, dense, and stable.
- Wind and precipitation: High winds make balancing impossible, and snow or rain can make ice slippery and obscure hazards. If the forecast calls for storms, stay home.
- Ice quality: Tap the ice with your axe—if it sounds hollow, it’s unsafe (internal air pockets mean it’s weak). Solid ice should make a sharp, crisp sound. Avoid ice that’s gray, porous, or dripping (signs of melting).
3. Never Climb Alone—Teamwork Saves Lives
I’ve climbed with partners from all skill levels, but I’ve never climbed alone. Even the most experienced climbers can slip, get injured, or get stuck. A good partner will set up belays, spot hazards, and pull you out if something goes wrong.
Rules for climbing with a partner: – Always use a belay system (I prefer a GriGri for ice climbing—it’s reliable and easy to control). – Communicate constantly: “On belay?” “Belay on!” “Climbing!” “Climb on!” Clear communication avoids confusion. – Never stand directly below a climber—falling ice, tools, or gear can kill you in seconds.
4. Know Your Limits (and Respect Them)
Ego kills in ice climbing. I’ve turned back from routes that looked “easy” because the ice was unstable, or because I was tired. There’s no shame in bailing—live to climb another day. For beginners: start with easy, low-angle ice (60–70 degrees) and work your way up. Don’t rush to climb steep or overhanging ice until you’ve mastered the basics.
5. Prepare for Emergencies
Even with perfect preparation, things can go wrong. I always carry: – A first-aid kit (focus on frostbite and trauma supplies). – A satellite phone or GPS beacon (cell service is non-existent in most alpine areas). – Extra warm layers, high-calorie snacks (energy bars, nuts), and a thermos of hot liquid (to prevent hypothermia). – A rescue kit: prusik loops, a knife, and a pulley system (for self-rescue or helping a partner).
Pro tip: Practice self-rescue skills regularly. You never know when you’ll need to get yourself (or a partner) out of a jam.
How to Choose the Right Ice Wall (For Your Skill Level)
Picking the right ice wall is just as important as safety gear. The best ice wall for you depends on your experience, fitness level, and the conditions that day. Here’s my step-by-step guide to choosing climbable ice.
1. Prioritize Stability (The #1 Rule)
Stable ice is safe ice. Here’s how to spot it: – Color: Look for ice that’s clear, pale blue, or white. These are signs of dense, solid ice. Avoid gray, brown, or black ice—this is often porous,风化 (weathered), or mixed with dirt, making it weak. – Sound: As I mentioned earlier, tap the ice with your axe. A sharp, crisp “clink” means it’s solid; a dull “thud” means it’s hollow or weak. – Structure: Avoid ice with large cracks, holes, or overhangs (ice shelves). These are prone to collapsing. Look for smooth, continuous ice with no visible gaps.
2. Check the Thickness
Thin ice is a death trap. I never climb ice that’s less than 50cm (20 inches) thick. For beginners, aim for ice that’s 60–80cm thick—thicker ice is more stable and easier to place ice screws in. How to check thickness? Look for areas where ice meets rock—you can often see the ice’s depth there. If you’re unsure, drill a small hole with an ice screw to measure.
3. Match the Slope to Your Skill Level
Slope determines difficulty. Here’s a breakdown for different skill levels: – Beginner: 60–70 degrees (gentle slope). This is easy to balance on, and you can practice your axe and crampon technique without too much pressure. – Intermediate: 70–85 degrees (steeper slope). Requires more strength and precision, but still manageable with practice. – Advanced: 85–90 degrees (vertical) or overhanging. Only for experienced climbers—requires advanced technique and strength.
Pro tip: Avoid ice walls with sudden drops or irregular surfaces (like jagged ice spikes) if you’re a beginner. These increase the risk of tripping or getting stuck.
4. Check the Surroundings
The area around the ice wall is just as important as the ice itself. Look for: – No overhead hazards: Avoid ice walls with悬冰 (hanging ice) or loose rocks above—these can fall and hit you mid-climb. – A safe base: The bottom of the ice wall should be clear of deep cracks, water, or unstable snow. You need a safe place to set up your belay and land if you fall. – Accessibility: Make sure you can reach the ice wall without crossing dangerous terrain (like thin ice on a lake or steep, unprotected slopes).
5. Avoid These Common Mistakes
Even experienced climbers make mistakes when choosing ice. Here’s what to avoid: – Climbing ice that’s melting (dripping, slushy, or discolored). – Choosing ice walls in avalanche zones (check avalanche forecasts before you go). – Underestimating the weather—even a light wind can make a “easy” climb impossible. – Ignoring your gut: If something feels off (the ice sounds hollow, the slope is steeper than you thought), turn back. Your intuition is usually right.
Final Thoughts from a Pro
Ice climbing is one of the most rewarding sports I’ve ever done—there’s nothing like standing at the top of a frozen waterfall, looking out at the mountains, and knowing you earned every step. But it’s not a sport to take lightly. Safety comes first, preparation is key, and choosing the right ice wall can make the difference between a great climb and a dangerous one.
For beginners: Start with a professional guide. They’ll teach you the basics, help you choose safe ice, and keep you safe while you learn. For intermediate climbers: Keep practicing, stay humble, and never stop learning—ice climbing is a lifelong journey.
Now, grab your gear, check the weather, and find some solid ice. The mountains are waiting—but remember: the ice doesn’t care about your ambition. Respect it, and it will reward you.
Happy climbing, stay safe, and keep chasing the ice.