
If you’ve ever stood at the base of a bouldering wall, stared up at a set of smooth, rounded slopers, and thought, “How do people even hold those?”—you’re not alone. Slopers are the ultimate humbler in climbing: they look deceptively simple, yet they test your technique, strength, and mental grit more than almost any other hold type. Unlike crimps (which rely on raw finger power) or jugs (which feel like a gift), slopers demand finesse—they’re all about friction, body positioning, and trusting your movement over brute force.
As a beginner, one of the most critical decisions you’ll make to tackle slopers (and all climbing holds) with confidence is choosing your first pair of rock climbing shoes. Your climbing shoes are your connection to the wall—they affect your footwork, stability, and even your confidence. The wrong pair can leave you slipping, sore, or frustrated, while the right pair will support your learning journey and help you progress faster. Below is a complete guide to choosing your first rock climbing shoes, tailored for beginners and aligned with the skills you need to master slopers.
How to Choose Your First Rock Climbing Shoes
Choosing your first climbing shoes doesn’t have to be overwhelming. The key is to prioritize comfort, fit, and functionality—not just style or brand. As a beginner, you don’t need the most advanced, high-performance shoes; you need a pair that’s forgiving, supportive, and designed for learning. Here’s what to focus on, step by step.
1. Start with the Right Fit: Snug, Not Painful
The fit of your climbing shoes is the single most important factor—even more than brand or features. Climbing shoes need to be snug to give you precise control over your foot placements, but they shouldn’t cause sharp pain or numbness. Here’s how to find the perfect fit:
- Snug but not cramped: Your toes should be slightly curled (not curled tightly) and press gently against the front of the shoe. There should be no empty space in the toe box—if your foot slides around, you’ll lose control on slopers and small footholds. However, if your toes feel crushed or your feet go numb after 5 minutes, the shoes are too tight.
- Heel fit matters: The heel should fit snugly without slipping. A loose heel will cause your foot to slide forward, bunching your toes and reducing stability—critical for maintaining friction on slopers.
- Wear thin socks (or no socks): Most climbers wear climbing shoes without socks for better sensitivity, but if you prefer socks, wear thin, moisture-wicking ones when trying on shoes. Thick socks will make the shoes feel too tight, leading to a bad fit.
- Try them later in the day: Feet swell slightly throughout the day, so trying on shoes in the afternoon or evening will give you a more accurate fit (this mimics how your feet will feel after a few hours of climbing).
Remember: Climbing shoes will stretch slightly over time (especially leather ones), so if they feel a little tight but not painful, they’ll likely break in to a perfect fit. Avoid shoes that feel loose initially—they won’t get tighter, only looser.
2. Choose the Right Type: Beginner-Friendly Styles
Climbing shoes come in three main types, each designed for different climbing styles and skill levels. As a beginner, stick to styles that prioritize comfort and versatility, not extreme performance. Here’s a breakdown of the types to consider (and avoid):
- All-Purpose (Neutral) Shoes – Best for Beginners: These are the most versatile and comfortable option for new climbers. They have a flat or slightly downturned shape (no extreme “banana” curve), a medium-stiff sole, and often a high ankle for extra support. Neutral shoes work well for slopers, slabs, and basic bouldering—perfect for learning all foundational climbing skills. They’re designed to be worn for longer sessions without causing excessive fatigue.
- Moderately Downturned Shoes – For Intermediate Beginners: If you’re already practicing slopers and want a shoe that offers a bit more precision (without sacrificing comfort), a moderately downturned shoe is a good choice. The slight curve helps you stand on small footholds, while still being forgiving enough for long sessions.
- Aggressively Downturned (Performance) Shoes – Avoid as a Beginner: These shoes have a sharp, banana-like curve and a very stiff sole, designed for advanced climbers tackling hard routes. They’re uncomfortable for long wear, require precise footwork (which beginners haven’t mastered yet), and are overkill for slopers and basic climbing.
- Slippers – Optional for Gym Training: Climbing slippers are slip-on styles with elastic straps, perfect for quick穿脱 during gym sessions. They’re lightweight and offer good sensitivity, but they don’t provide as much support as lace-up shoes. They’re a good secondary option, but not ideal as your first pair.
3. Sole Stiffness: Balance Support and Sensitivity
The stiffness of the shoe’s sole affects both support and sensitivity—two key factors for climbing slopers. For beginners, a medium-stiff sole is ideal:
- Stiff soles: Offer more support for your feet, making it easier to stand on small footholds and slopers without your feet tiring. They’re great for beginners who are still building foot strength, but they have less sensitivity (you’ll feel less of the wall under your feet).
- Soft soles: Provide more sensitivity, letting you feel small changes in the wall (critical for slopers, where friction is key). However, they offer less support, which can lead to foot fatigue during long sessions. Save soft-soled shoes for when you’re more comfortable with your footwork.
Medium-stiff soles strike the perfect balance—they support your feet while still letting you feel the wall, helping you learn to trust friction on slopers.
4. Closure System: Lace-Up vs. Velcro vs. Slipper
The closure system affects how well you can adjust the fit of your shoes and how easy they are to put on/take off. For beginners, here’s what to know:
- Lace-Up: The most adjustable closure system. You can tighten or loosen different parts of the shoe (toe box, midfoot, heel) for a custom fit. Lace-up shoes are durable and offer the best support, making them a great choice for beginners who want a shoe that will last as they progress.
- Velcro: Easy to put on and take off—perfect for gym sessions where you might remove your shoes between climbs. They’re less adjustable than lace-up shoes but still offer a snug fit for beginners. Many all-purpose beginner shoes use Velcro for convenience.
- Slipper: Slip-on style with elastic straps. They’re the easiest to put on/take off but offer the least adjustability. They’re best for short sessions or as a secondary pair, not your first pair of climbing shoes.
5. Material: Leather vs. Synthetic
Climbing shoes are made from either leather or synthetic materials, each with pros and cons for beginners:
- Leather: Stretches more over time (up to a full size), so you can size down slightly for a snug fit that breaks in perfectly. Leather is breathable, which helps keep your feet dry during long sessions—critical for maintaining friction on slopers (sweaty feet slip easily). It’s also durable, making it a good investment for beginners.
- Synthetic: Stretches very little (if at all), so you need to get the fit right from the start. Synthetic materials are often cheaper than leather and dry faster, which is helpful if you sweat a lot. They’re a good option if you want a consistent fit without breaking them in.
6. Avoid Common Beginner Mistakes

When choosing your first pair, steer clear of these mistakes that can derail your learning:
- Buying shoes that are too tight: Painful shoes will make you dread climbing and can even cause foot injuries. A snug fit is good; a painful fit is not.
- Buying “advanced” shoes to “grow into”: High-performance shoes are uncomfortable and require advanced footwork to use properly. Stick to beginner-friendly styles—you’ll progress faster with shoes that support your current skill level.
- Focusing on brand over fit: A lesser-known brand with a perfect fit is better than a top brand that’s too tight or loose. Try on multiple brands to find what works for your foot shape.
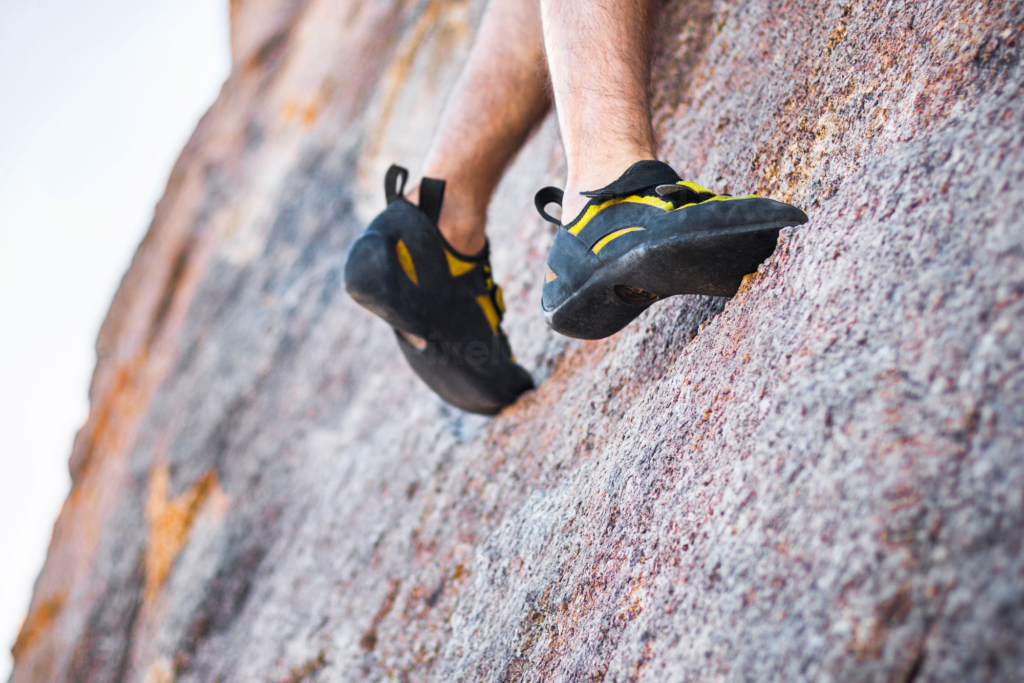
- Forgetting about sloper-specific needs: Look for shoes with a sticky rubber sole (like Vibram) for extra friction—this is key for slopers, where your feet rely on grip as much as your hands.
7. Test Before You Buy (If Possible)
If you have a local climbing gym or outdoor store that sells climbing shoes, always try them on and test them on a small climbing wall. Walk around in them, stand on small footholds, and even try a simple sloper if possible. This will help you feel how the shoes fit and perform, ensuring you make the right choice. Many gyms also offer shoe rentals—renting different styles first is a great way to test what works for you before investing in a pair.
Final Tips for Your First Climbing Shoes
Your first pair of climbing shoes should be an investment in your progress—not a fashion statement. Prioritize fit, comfort, and versatility, and choose a pair that works for slopers and basic climbing (since that’s where you’ll spend most of your early sessions). Remember: As you improve, you can upgrade to more specialized shoes, but for now, a good beginner pair will help you build the footwork and confidence you need to tackle slopers and beyond.
Once you have your shoes, pair them with the grip strength exercises and sloper techniques from this guide—you’ll be sending routes you never thought possible in no time. Happy climbing!